
Install Airflow on Docker
Hi, I am coder2j.
In this airflow tutorial, I will show you how to install Airflow on Docker and run it with Docker Compose.
If you are a video person, check out the YouTube video.
Let’s dive right in!
At the time of writing this post, the latest version of Apache Airflow is 2.6.3.
Prerequisites #
Before we begin, ensure you have Docker and Docker Compose installed on your system. You can download them from the official Docker website: Docker Downloads.

Step 1: Create a Docker Compose File #
First, you’ll need to create a docker-compose.yaml file in a directory of your choice. This file will define the services required for running Apache Airflow and its dependencies. Below is a basic example of a docker-compose.yaml file:
version: '3.8' x-airflow-common: &airflow-common image: ${AIRFLOW_IMAGE_NAME:-apache/airflow:2.6.3} environment: &airflow-common-env AIRFLOW__CORE__EXECUTOR: LocalExecutor AIRFLOW__DATABASE__SQL_ALCHEMY_CONN: postgresql+psycopg2://airflow:airflow@postgres/airflow # For backward compatibility, with Airflow <2.3 AIRFLOW__CORE__SQL_ALCHEMY_CONN: postgresql+psycopg2://airflow:airflow@postgres/airflow AIRFLOW__CORE__FERNET_KEY: 'your-very-strong-key' AIRFLOW__CORE__DAGS_ARE_PAUSED_AT_CREATION: 'true' AIRFLOW__CORE__LOAD_EXAMPLES: 'true' AIRFLOW__API__AUTH_BACKENDS: 'airflow.api.auth.backend.basic_auth,airflow.api.auth.backend.session' AIRFLOW__SCHEDULER__ENABLE_HEALTH_CHECK: 'true' volumes: - ${AIRFLOW_PROJ_DIR:-.}/dags:/opt/airflow/dags - ${AIRFLOW_PROJ_DIR:-.}/logs:/opt/airflow/logs - ${AIRFLOW_PROJ_DIR:-.}/config:/opt/airflow/config - ${AIRFLOW_PROJ_DIR:-.}/plugins:/opt/airflow/plugins user: "${AIRFLOW_UID:-50000}:0" depends_on: &airflow-common-depends-on postgres: condition: service_healthy services: postgres: image: postgres:13 environment: POSTGRES_USER: airflow POSTGRES_PASSWORD: airflow POSTGRES_DB: airflow volumes: - postgres-db-volume:/var/lib/postgresql/data healthcheck: test: ["CMD", "pg_isready", "-U", "airflow"] interval: 10s retries: 5 start_period: 5s restart: always airflow-webserver: <<: *airflow-common command: webserver ports: - "8080:8080" healthcheck: test: ["CMD", "curl", "--fail", "http://localhost:8080/health"] interval: 30s timeout: 10s retries: 5 start_period: 30s restart: always depends_on: <<: *airflow-common-depends-on airflow-init: condition: service_completed_successfully airflow-scheduler: <<: *airflow-common command: scheduler healthcheck: test: ["CMD", "curl", "--fail", "http://localhost:8974/health"] interval: 30s timeout: 10s retries: 5 start_period: 30s restart: always depends_on: <<: *airflow-common-depends-on airflow-init: condition: service_completed_successfully airflow-init: <<: *airflow-common entrypoint: /bin/bash # yamllint disable rule:line-length command: - -c - | function ver() { printf "%04d%04d%04d%04d" $${1//./ } } airflow_version=$$(AIRFLOW__LOGGING__LOGGING_LEVEL=INFO && gosu airflow airflow version) airflow_version_comparable=$$(ver $${airflow_version}) min_airflow_version=2.2.0 min_airflow_version_comparable=$$(ver $${min_airflow_version}) if (( airflow_version_comparable < min_airflow_version_comparable )); then echo echo -e "\033[1;31mERROR!!!: Too old Airflow version $${airflow_version}!\e[0m" echo "The minimum Airflow version supported: $${min_airflow_version}. Only use this or higher!" echo exit 1 fi if [[ -z "${AIRFLOW_UID}" ]]; then echo echo -e "\033[1;33mWARNING!!!: AIRFLOW_UID not set!\e[0m" echo "If you are on Linux, you SHOULD follow the instructions below to set " echo "AIRFLOW_UID environment variable, otherwise files will be owned by root." echo "For other operating systems you can get rid of the warning with manually created .env file:" echo " See: https://airflow.apache.org/docs/apache-airflow/stable/howto/docker-compose/index.html#setting-the-right-airflow-user" echo fi one_meg=1048576 mem_available=$$(($$(getconf _PHYS_PAGES) * $$(getconf PAGE_SIZE) / one_meg)) cpus_available=$$(grep -cE 'cpu[0-9]+' /proc/stat) disk_available=$$(df / | tail -1 | awk '{print $$4}') warning_resources="false" if (( mem_available < 4000 )) ; then echo echo -e "\033[1;33mWARNING!!!: Not enough memory available for Docker.\e[0m" echo "At least 4GB of memory required. You have $$(numfmt --to iec $$((mem_available * one_meg)))" echo warning_resources="true" fi if (( cpus_available < 2 )); then echo echo -e "\033[1;33mWARNING!!!: Not enough CPUS available for Docker.\e[0m" echo "At least 2 CPUs recommended. You have $${cpus_available}" echo warning_resources="true" fi if (( disk_available < one_meg * 10 )); then echo echo -e "\033[1;33mWARNING!!!: Not enough Disk space available for Docker.\e[0m" echo "At least 10 GBs recommended. You have $$(numfmt --to iec $$((disk_available * 1024 )))" echo warning_resources="true" fi if [[ $${warning_resources} == "true" ]]; then echo echo -e "\033[1;33mWARNING!!!: You have not enough resources to run Airflow (see above)!\e[0m" echo "Please follow the instructions to increase amount of resources available:" echo " https://airflow.apache.org/docs/apache-airflow/stable/howto/docker-compose/index.html#before-you-begin" echo fi mkdir -p /sources/logs /sources/dags /sources/plugins chown -R "${AIRFLOW_UID}:0" /sources/{logs,dags,plugins} exec /entrypoint airflow version # yamllint enable rule:line-length environment: <<: *airflow-common-env _AIRFLOW_DB_UPGRADE: 'true' _AIRFLOW_WWW_USER_CREATE: 'true' _AIRFLOW_WWW_USER_USERNAME: ${_AIRFLOW_WWW_USER_USERNAME:-airflow} _AIRFLOW_WWW_USER_PASSWORD: ${_AIRFLOW_WWW_USER_PASSWORD:-airflow} _PIP_ADDITIONAL_REQUIREMENTS: '' user: "0:0" volumes: - ${AIRFLOW_PROJ_DIR:-.}:/sources volumes: postgres-db-volume: Make sure to replace your-very-strong-key with your secret keys for security purposes. For test purposes, you can leave it as it is.
Step 2: Start Apache Airflow #
Open your terminal, navigate to the directory containing your docker-compose.yaml file, and run the following command:
docker-compose up This command will start Apache Airflow and PostgreSQL (used as Airflow’s metadata database) containers. Once the containers have been launched successfully, you can see the log like the following:

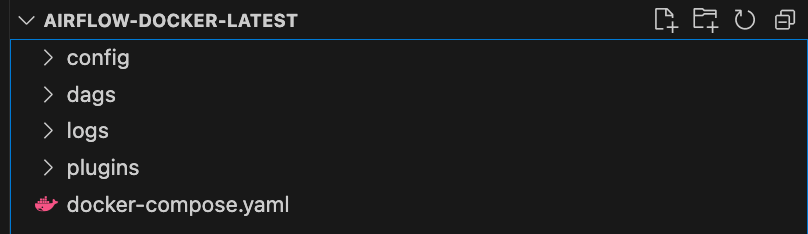
Airflow will create a couple of folders and your project directory will look similar to this:
Step 3: Access the Airflow Web UI #
Once the containers are up and running, you can access the Apache Airflow Web UI by opening a web browser and navigating to http://localhost:8080. The default login username is airflow and the password is airflow too. You should see the Airflow dashboard, where you can start managing your workflows.

Step 4: Change Airflow’s Configurations #
You can create a .env environmental variable file in the project directory to customize the airflow’s configuration. For example, use the following two environmental variables to change the airflow webserver login username and password
_AIRFLOW_WWW_USER_USERNAME=my_username _AIRFLOW_WWW_USER_PASSWORD=my_password Step 5: Add Your DAGs #
Remember the dags directory that was created by Airflow earlier? This is where you can add your custom DAG files to define your workflows. Apache Airflow will automatically detect and execute these DAGs according to your specifications.
That’s it! You should have successfully installed Apache Airflow on Docker and get it running with Docker Compose.
Now, it’s your turn. Do I cover everything you need to get Airflow running on Docker?
Let me know if you face any issues or any suggestions in the comment below.
Related Posts

Comments: